How to install EZ-Track™
Introduction
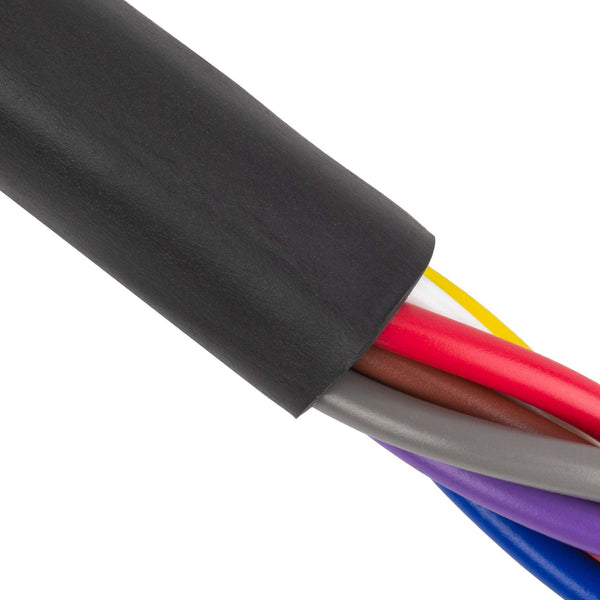
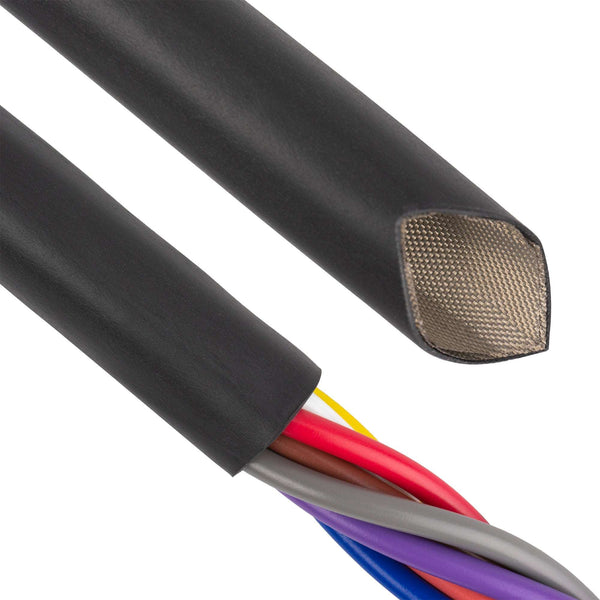
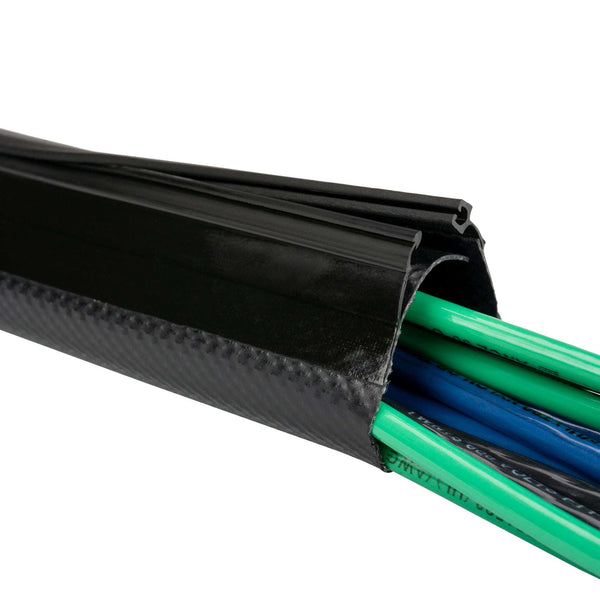
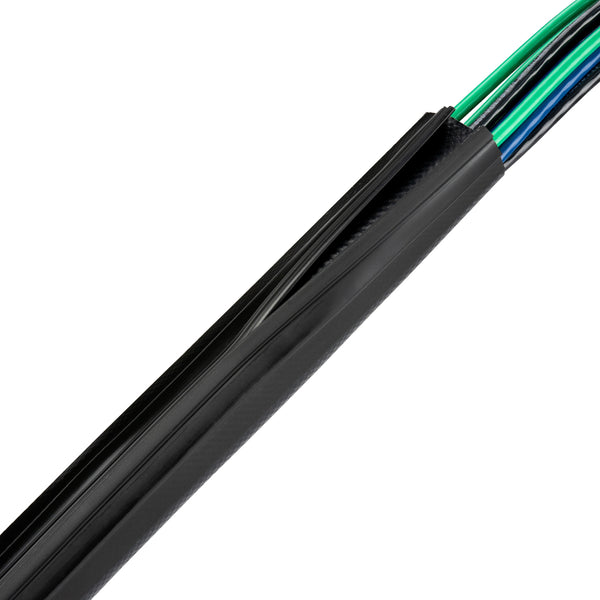
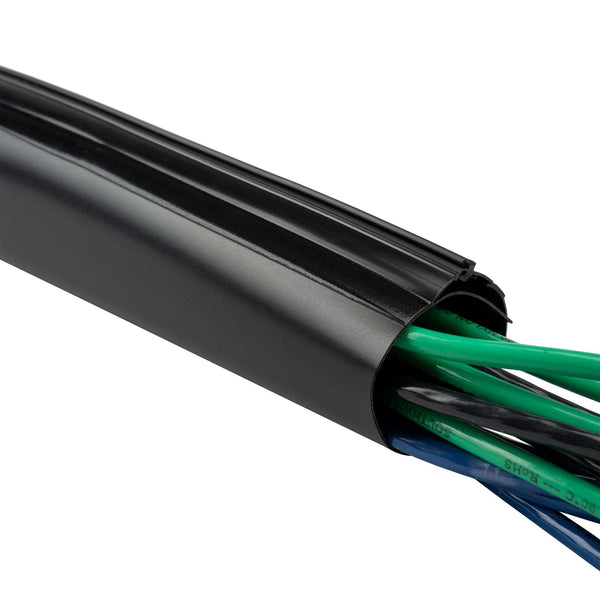
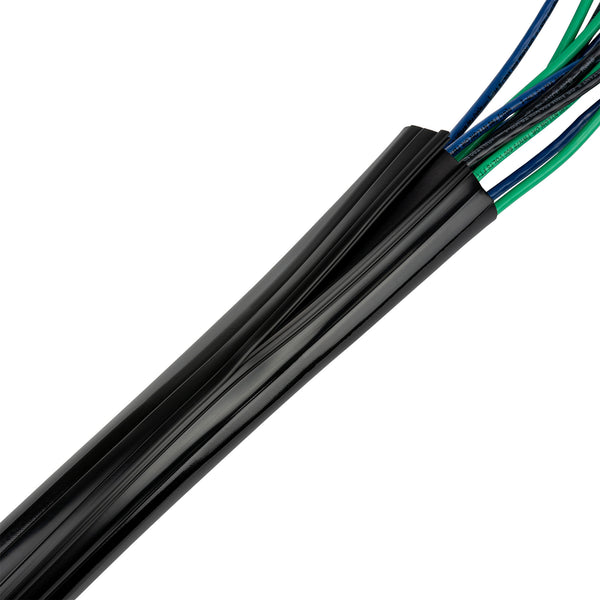
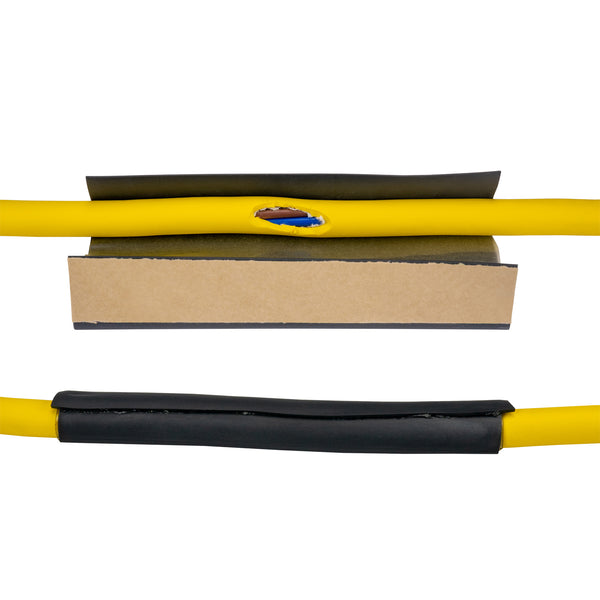
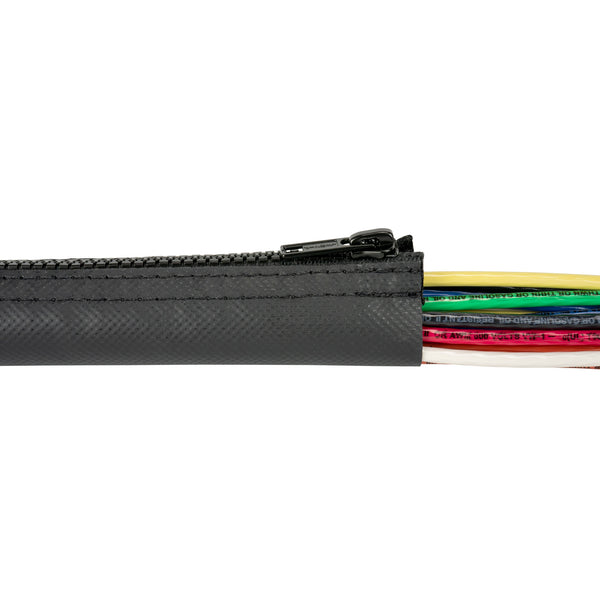
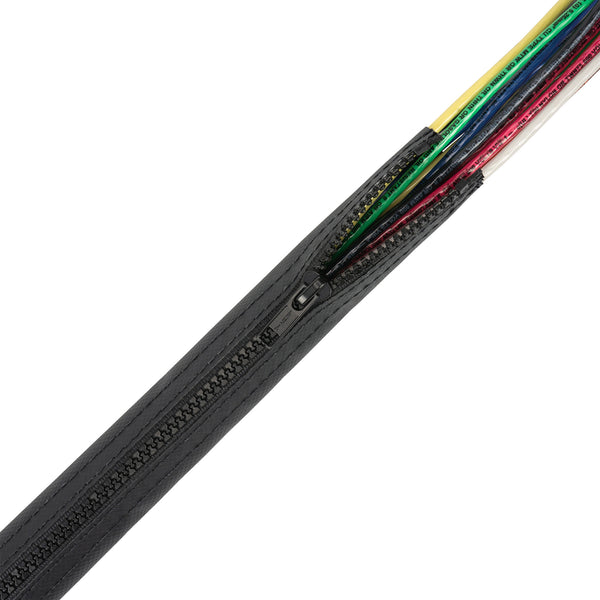
EZ-Track™ was engineered and manufactured for light to medium duty applications. This product is ideal for your server room, shop, office or many other types of applications where protection, bundling, organization and safety are a necessity. Because it is manufactured from a flexible PVC compound there are no sharp edges to damage wires during the cable assembly process. The patented external closure system allows for much higher cable fill rates and easier accessibility for faster installations.
With its arrowhead-and-channel interlock-design closure, the EZ-Track™ is as easy to install as its name implies. Whether you’ve chosen the single extrusion of EZ-Track™ or needed a larger diameter by adding an additional jacket, the EZ-Track™ will help your wires or cables stay better protected and organized. The wrap around or side entry allows for modular cable design, reducing the total installed cost, and the EZ-Track™ closure method insures that cables are not exposed to contaminates, reducing total operating costs.
TRACK CLOSURE VS. BEND LOCATION

Installation Notes:
Always size the Zippertubing® jacket at least 1/8 inch larger than the maximum cable diameter. If severe cable bending is anticipated, increasing jacket diameter beyond the 1/8 inch requirement is advisable.
Always install Zippertubing® jackets so that the track faces the outside of the bend radius. Failure to position the jacket in this manner may result in the track “popping open” due to track distortion
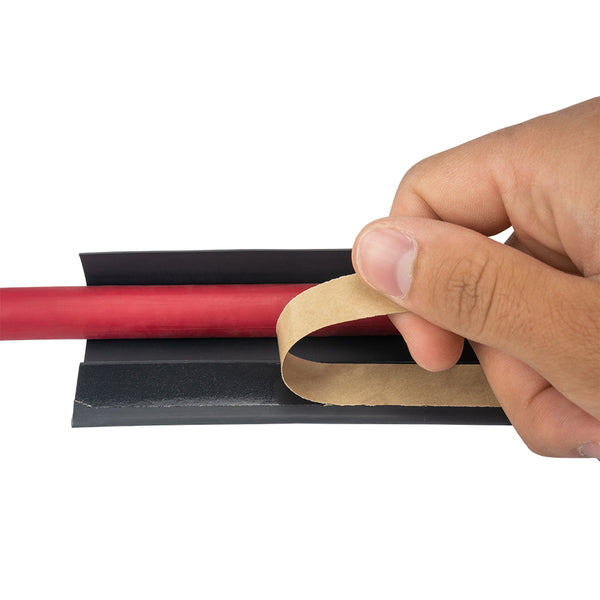
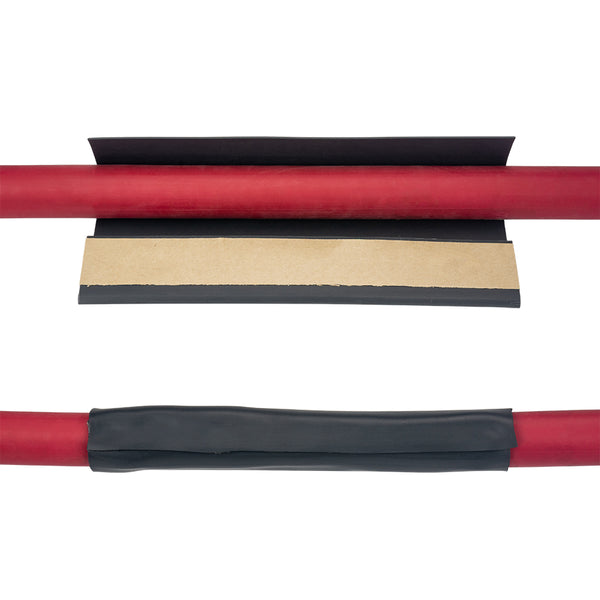
If the design does not call for re-opening the jacket periodically, it may be desirable to seal the track closed using ZT-TAPE.
The most common causes of tracks “popping open” are:
- Improperly closed track
- Incorrectly sized jacket, less than 1/8 inch oversize
- Track located other than on the outside of the bend radius
INSTALLATION TOOLS:
SL-EZ SLIDER

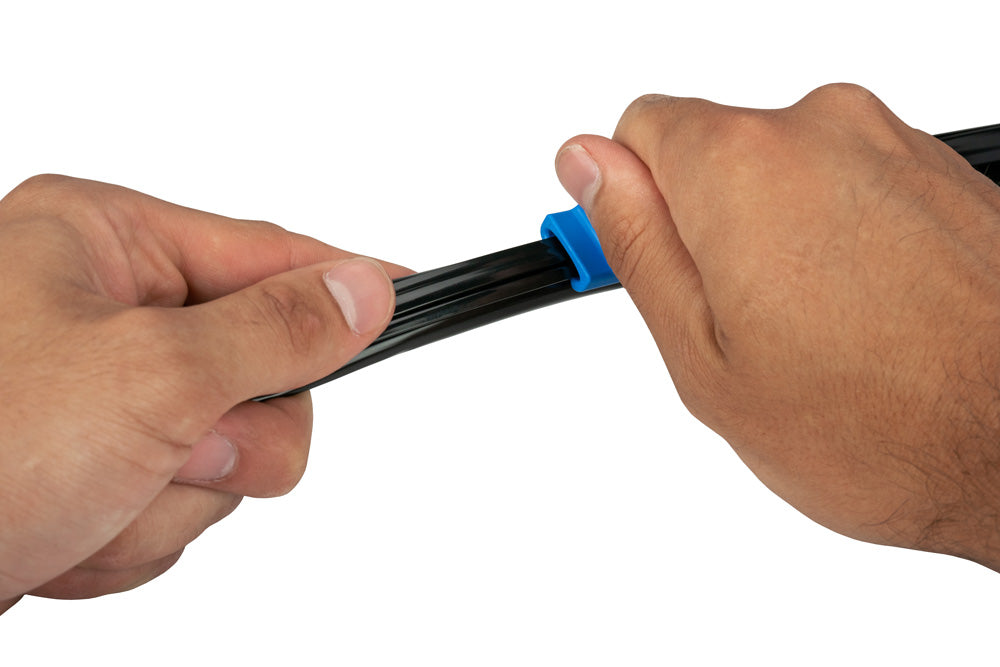
The SL-EZ tool is an inexpensive plastic slider tool designed for closing Zippertubing® EZ-Track™ products. It is primarily intended for use in low volume production line applications or field installations. The tool engages the external ears of the EZ-Track™ extrusion and snaps the interlock together as it is slid along the cable run. This tool makes closing EZ-Track™ fast and easy while minimizing operator fatigue. The tool is used after squeezing the two track halves together manually with your fingers at the jacket end. The tool is then slid along this short section of pre-closed track. As the tool is slid along the cable run, it will pre-form the jacket around the cable and form a closed continuous tube.
ZTEZ-SP PLIER

The ZTEZ-SP tool is a Stainless Steel plier tool designed for closing Zippertubing® EZ-Track™ products. It has two roller wheels which engage under the external ears of the EZ-Track™ extrusion. Squeezing the handles drives the interlock mechanism together, as the operator pulls the tool along the cable the EZ-Track™ jacket forms around the cable harness and is snapped together to form a continuous tube. This tool makes closing EZ-Track™ fast and easy while minimizing operator fatigue. The ZTEZ-SP tool is primarily intended for use in high volume production line installations where hundreds or thousands of feet of material require closing.
General Installation Notes
The length of your installation can affect the way you close the EZ-Track™. If you have a longer run then you may either need an assistant to work in front of you a couple of feet or use a loose cable tie to wrap around the EZ-Track™ or while you’re sliding the tool.

Friction: While using the SL-EZ slider tool you may experience some unwanted friction. If this is the case simply use a few drops of Isopropyl Alcohol along the track surface.

Plier Tool: If you have an application that requires more than 50 feet you may want to upgrade to Zippertubing’s ZTEZ-SP plier. The ZTEZ-SP plier tool is a Stainless Steel plier designed specifically for Zippertubing’s EZ-Track™
CAUTION: Do not use oils or Silicone based lubricants that will remain on the jacket/track surface since these materials may reduce the mechanical closure strength and contaminate the finished assembly.
Closing EZ-Track™ using the SL-EZ Slider Tool
Step 1: Wrap the end of the EZ-Track™ around the cable that you are covering. Using your thumb and index fingers, push the arrow into the mating channel cavity together about 1” down the track.

Step 2: Slide the SL-EZ slider tool over the two external ridges of the area you’ve closed. Work the SL-EZ slider tool approximately 1” down the EZ-Track™.

Step 3: Grab the closed end of the EZ-Track™ and begin to slide the tool along the cable length. Once you’ve closed 6-8” of the EZ-Track™, you can grab the entire track and have more leverage to pull the SL-EZ slider tool to continue your installation.
Closing EZ-Track™ using the ZTEZ-SP Plier Tool
Step 1: Wrap the end of the EZ-Track™ around the cable that you are covering. Using your thumb and index fingers, push the arrow into the mating channel cavity together about 1” down the track.
Step 2: Allow the handles of the “ZTEZ-SP” tool to open and align the two roller wheels over the two external closure ridges. Squeeze the tool handles closed to engage the roller wheels with the ridges.
The larger roller wheel should be positioned over the channel cavity.

Step 3: Grasp the closed end of the EZ-Track™ interlock using your thumb and index finger, then begin pulling the “ZTEZ-SP” tool along the cable length. Once 6-8 inches (10-20 cm) of track have been closed you can grasp the entire cable assembly with your hand as you pull the tool along.

Sealing Zippertubing® Extruded Tracks
All Zippertubing® products that utilize extruded closure tracks (except type FEP) can be permanently sealed after closure using the following method. Under normal circumstances a properly closed Zippertubing® track does not require post closure sealing. However, in some applications where an environmental or tamper proof seal is desired or extreme abuse is anticipated, the post sealing process can insure that the track does not re-open inadvertently.

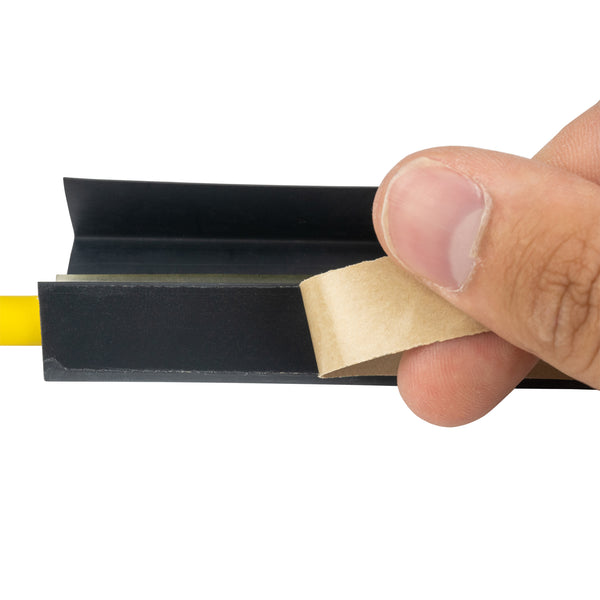
ZT-TAPE
This method involves placing a 1-inch wide strip of Zippertubing’s ZT-Tape down the center of the inter-locking track split line after the track has been closed. The ZT-Tape is a UL-510 recognized, fire retardant, Polyurethane film tape with an Acrylic adhesive backing. The adhesive is compatible with both PVC and PFR track materials and is easily applied. The tape sealing method provides additional closure strength, improves environmental tightness and is an environmentally friendly process.
CAUTION: The ZT-Tape is highly elastic and must be applied to the track in a relaxed condition. Stretching the tape during installation can result in disbonding of the film from the adhesive if the assembly is stored or shipped in a coiled or tightly bent condition.
Opening a Fully Closed Jacket
If re-entry is required after the entire EZ-Track® jacket has been fully closed then the re-opening process should begin at the end of the tubing. Follow the steps shown below to separate the track interlock mechanism and then peel the track apart as necessary to gain access.
Step 1: For this step we will be using a ¼” wide flat head screwdriver to open the EZ-Track™ interlock mechanism. Upon re-entry be careful not to damage the interlock mechanism or the components within the EZ-Track™ assembly.

Step 2: Insert your flat head screw driver 3/8” to ½” back from the end of the EZ-Track™. Next, rotate your screwdriver to a vertical position and push the arrowhead from the channel.
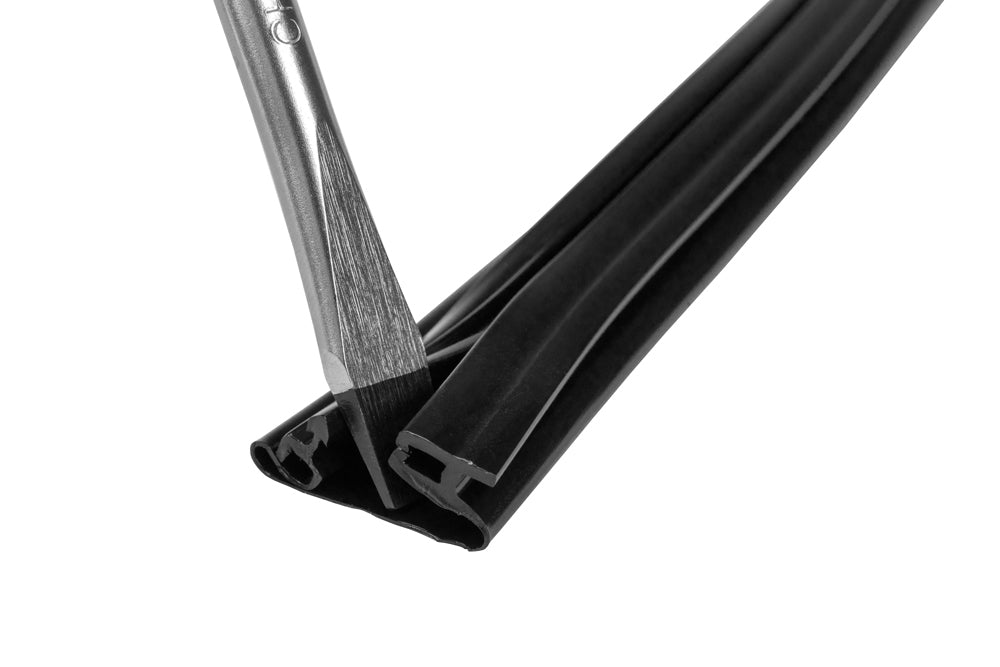
Step 3: Once the two halves of the EZ-Track™ have been separated, remove the screwdriver and continue to separate the two halves using your thumbs and index fingers.