How to install PRT-ES®
Watch our video or read our full instruction guide with helpful images to ensure your PRT-ES installation is correct.
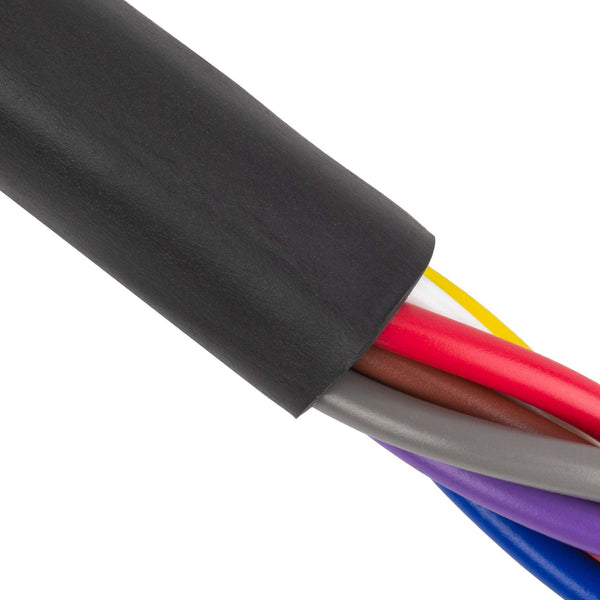
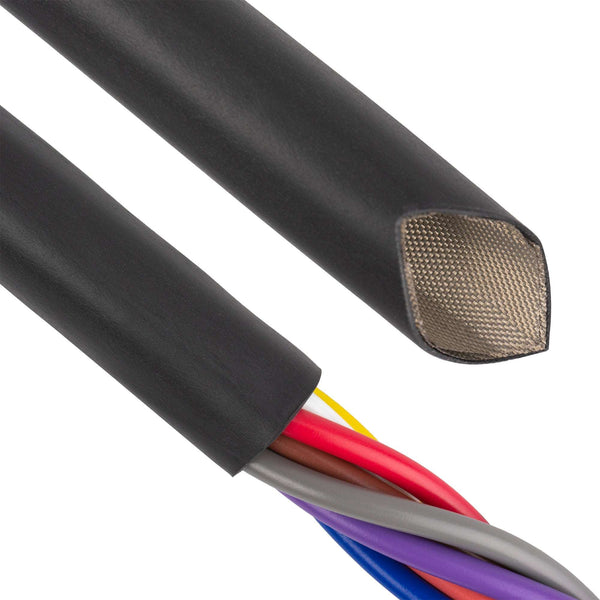
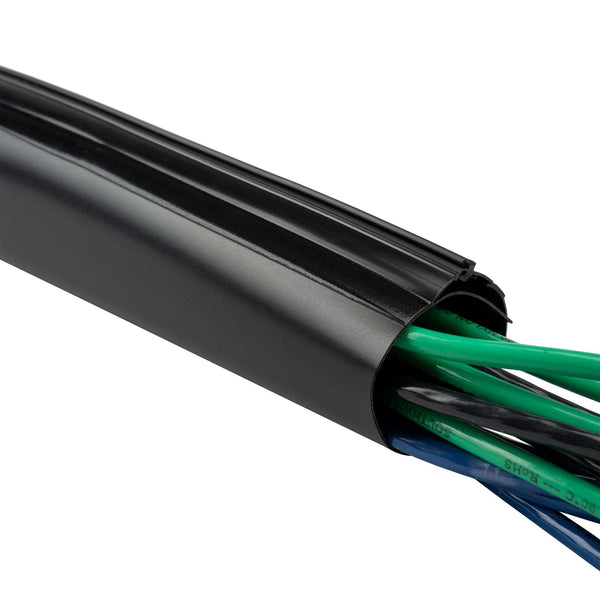
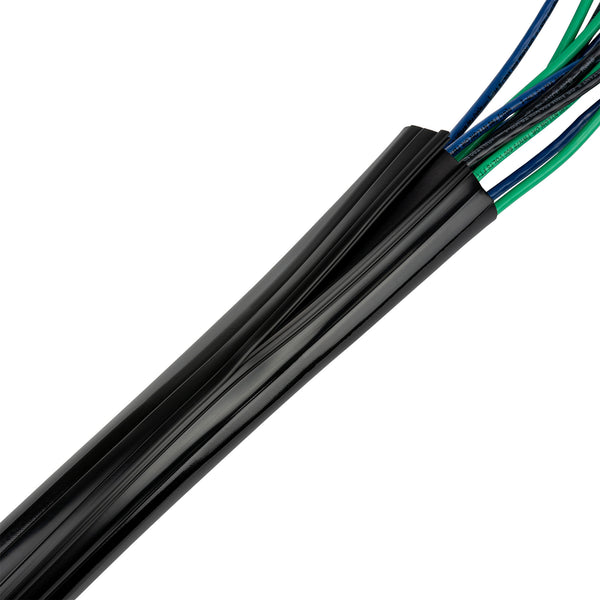
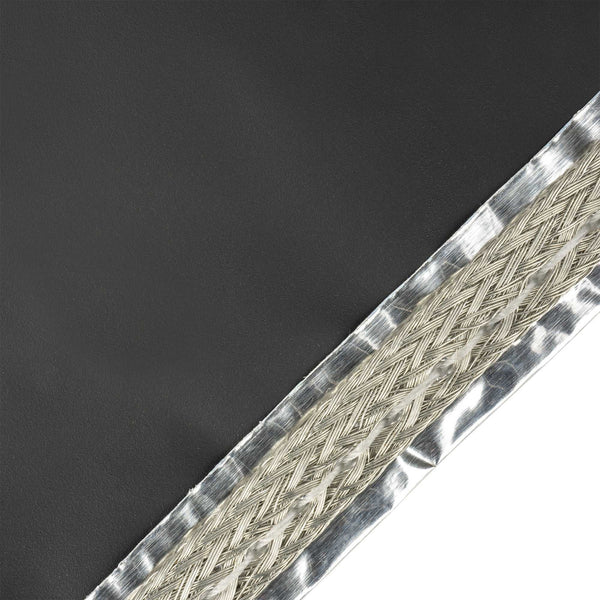
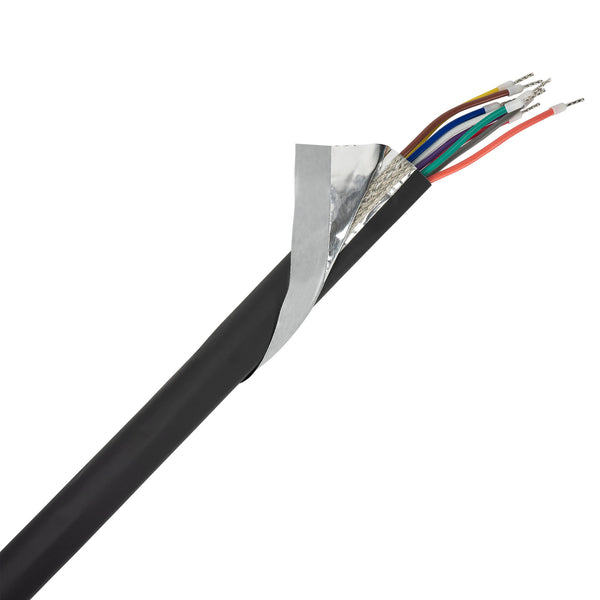
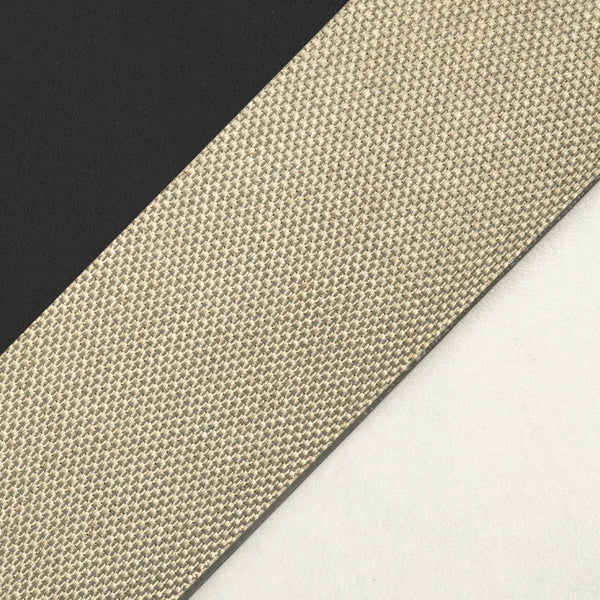
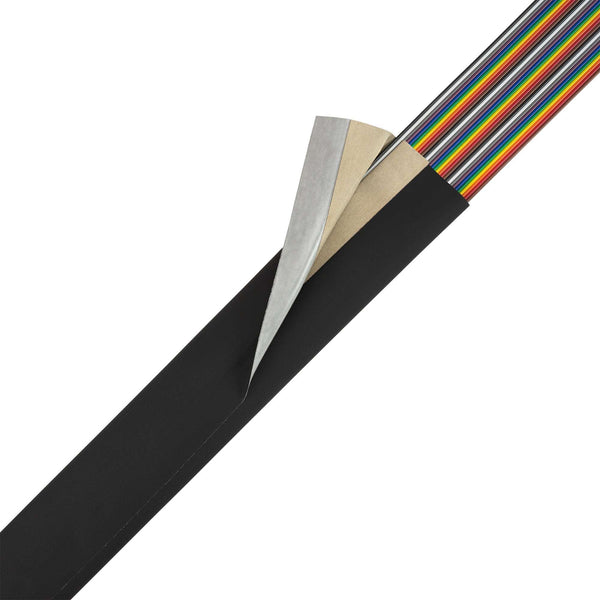
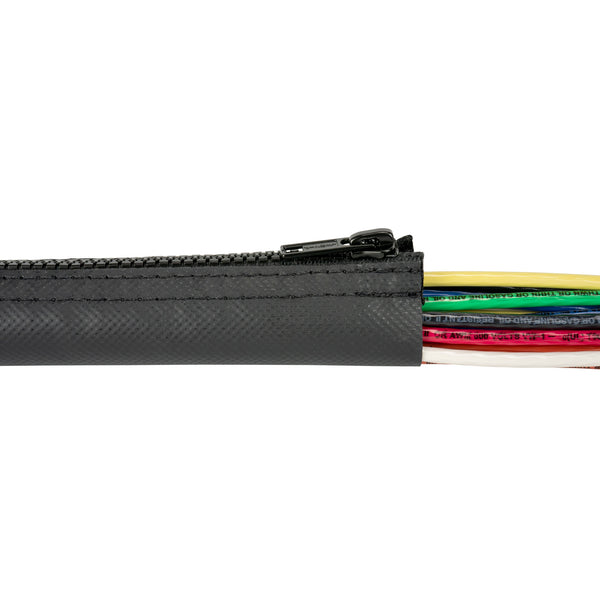
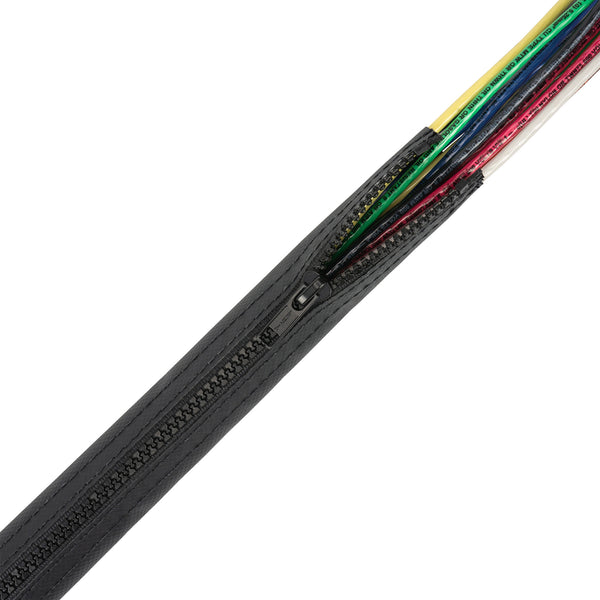
PRT-ES® combines the proven benefits of heat shrinkable tubing, a hot melt adhesive and the ease of installation using Zippertubing's wrap around heat shrink products. This PRT-ES® is designed to provide "Water Blocking" an environmentally sealed repair patch to wires and cables. PRT-ES® material has an operational temperature range of -55 to 135°C.
When a heat shrinkable jacket is applied over a cable, the jacket creates a secondary protective barrier that provides additional mechanical and electrical protection. However, under extreme environmental conditions moisture and contaminates can wick between the secondary jacket and the cable insulation. The resulting environment exposure can lead to corrosion of any exposed conductors and potential circuit failure. The most effective way to eliminate this problem is to ensure that there are no voids or gaps between the secondary jacket and the cable jacket. To achieve this condition semi-liquid sealants and mastics have classically been used. This sealing process is commonly referred to as "Water Blocking" and the most reliable way to achieve this when using heat shrinkable parts is to apply a hot melt adhesive under the tubing material prior to shrinking. The hot melt adhesive will flow during the heating process and the constricting tubing will drive the molten sealant into all the voids and gaps. Once the gaps have been filled there will be no air space between the two layers and no pressure differential between the inside and outside of the cable assembly. Changes in external atmospheric pressure or water pressure will not cause moisture or contaminates to migrate into the cable repair area.
Installation Sections:
Procedure "A"describes installing Zippertubing's PRT-ES® (100) and PRT-ES (135) products. The PRT-ES® design is a one-piece part containing both the wrap around shrink tubing and a preinstalled internal layer of hot melt adhesive. These designs are intended for cables sizes up to .250" diameter when using PRT-ES® (100) and up to 1.88" diameter when using PRT-ES® (135). Refer to Table 1 for sizing and material part numbers.
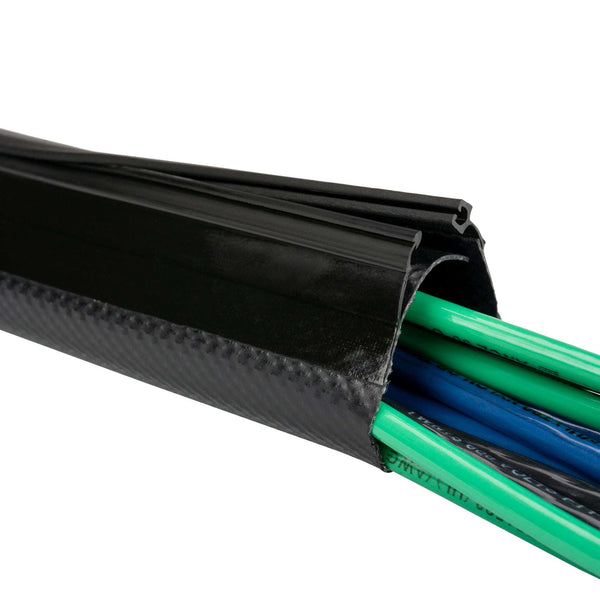
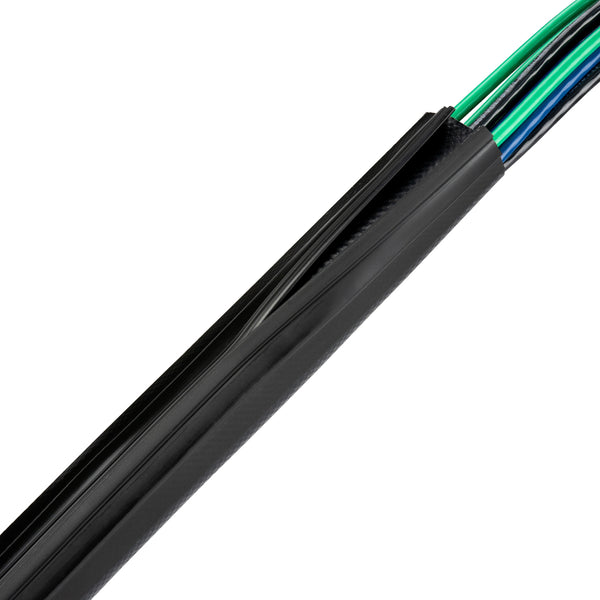
Procedure "B" describes installing Zippertubing's PRT® and Z-Block® hot melt tape adhesive as two separate components to achieve a similar repair as described in procedure "A". Refer to Table 2 for sizing and material part numbers.
Troubleshooting describes common installation problems and how to resolve them.
Procedure A - Step 1: Sizing
Measure the outside diameter of the damaged wire or cable and determine the correct size of PRT-ES® from Tables 1A or 1B.
TABLE 1A:PRT-ES® (100) Part Numbers
| Cable Diameter (in.) | Zippertubing P/N |
|---|---|
| 0.040 to 0.075" | ZT11-04-005-01 |
| 0.076" to 0.125" | ZT11-04-005-03 |
| 0.126" to 0.174" | ZT11-04-005-05 |
| 0.175" to 0.250" | ZT11-04-005-07 |
TABLE 1B: PRT-ES® (135) Part Numbers
| Cable Diameter (in.) | Zippertubing P/N | National Stock Number |
|---|---|---|
| 0.040" to 0.075" | ZT03-04-010-01 | 5970-01-611-7759 |
| 0.076" to 0.125" | ZT03-04-010-03 | 5970-01-611-8106 |
| 0.126" to 0.174" | ZT03-04-010-05 | 5970-01-611-8111 |
| 0.175" to 0.249" | ZT03-04-010-07 | 5970-01-611-8118 |
| 0.25" to 0.37" | ZT03-04-010-09 | 5970-01-611-8178 |
| 0.38" to 0.49" | ZT03-04-010-11 | 5970-01-611-8206 |
| 0.50" To 0.62" | ZT03-04-010-13 | 5970-01-611-8240 |
| 0.63" to 0.74" | ZT03-04-010-15 | 5970-01-611-8252 |
| 0.75" to 0.87" | ZT03-04-010-17 | 5970-01-611-8263 |
| 0.88" to 0.99" | ZT03-04-010-19 | 5970-01-611-8434 |
| 1.00" to 1.12" | ZT03-04-010-21 | 5970-01-611-8441 |
| 1.13" to 1.24" | ZT03-04-010-23 | 5970-01-611-8504 |
| 1.25" to 1.37" | ZT03-04-010-25 | 5970-01-611-8252 |
| 1.38 to 1.49" | ZT03-04-010-27 | 5970-01-611-8558 |
| 1.50" to 1.62" | ZT03-04-010-29 | 5970-01-611-8570 |
| 1.63" to 1.74" | ZT03-04-010-31 | 5970-01-611-8582 |
| 1.75" to 1.87" | ZT03-04-010-33 | TBD |
Procedure A - Step 2: Preparation & Positioning
Use a razor knife to remove any protruding pieces of cable insulation. Clean the repair area of all debris and oil contamination using a mild solvent like isopropyl alcohol(IPA).

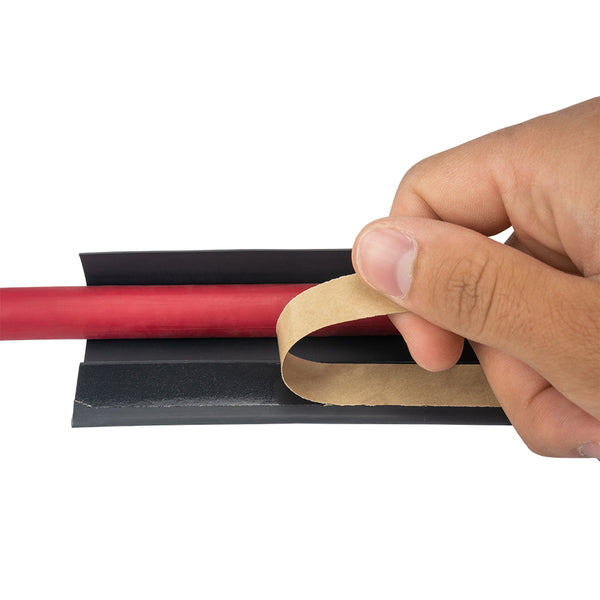
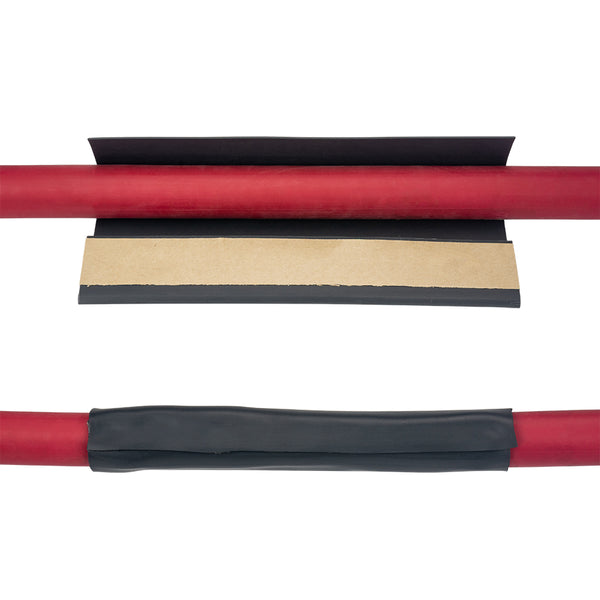
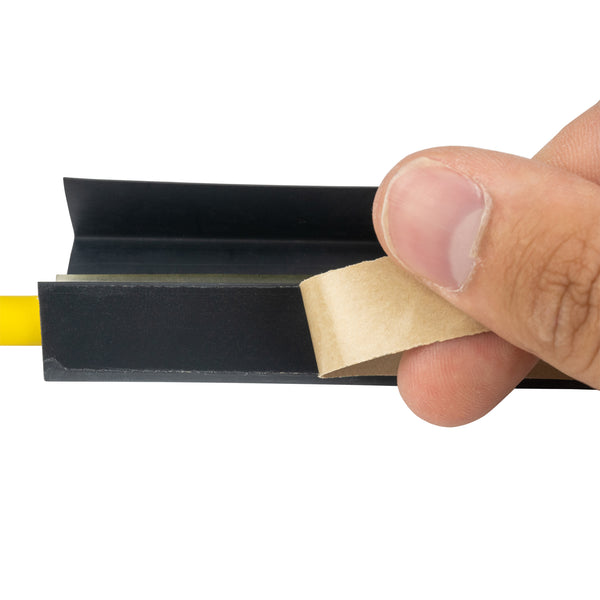
Wrap the PRT-ES® tubing around the damaged wire with the adhesive release liner facing away from the wire. Peel back a portion of the release liner and expose the adhesive. Position the non-adhesive edge of the tubing over the exposed adhesive and align so the edge just covers the entire adhesive area and no more. Begin bonding the tubing overlap edge to the adhesive. Avoid contacting the adhesive with your fingers as much as possible. Remove short sections of the release liner until the entire tubing length is sealed. Rub the overlap seam area firmly using your thumb to work out any wrinkles. Minor wrinkles will disappear when the tubing shrinks.

Center the closed PRT-ES® tubing over the damaged area of the wire or cable.
Procedure A - Step 3: Shrinking
Depending on the PRT-ES® product you are using, the heat gun will need to be set at a temperature to shrink the heat shrink and melt the hot-melt adhesive within. For the PRT-ES® (100) product, you will need a heat gun capable of reaching the temperature of 100°C. If you are using the PRT-ES® (135) version of this product, then you will need a heat gun that can melt the internal hot melt adhesive at 135°C.

Note: You can shrink the tubing in place immediately after sealing. The closure adhesive has no cure time requirements.
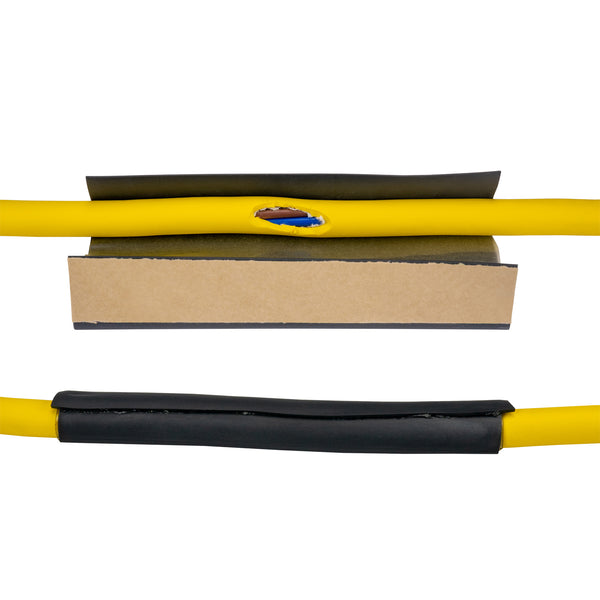
Begin shrinking the PRT-ES® tubing by directing the heat source at the adhesive overlap seam area near the center of the repair tubing. Apply heat to the adhesive overlap area only! The overlap area will tend to curl up into a "U" shape as it is heated. Continue to apply heat in short bursts to this area until the surrounding tubing begins to shrink and pull the "U" shape back down flat. Do not be afraid to apply extra heat to the overlap area, as it will take extra dwell time for the inside layer of the overlap to begin to shrink since this area is double thick. Do not be alarmed if the outer layer of the overlap flap tends to lift off the adhesive and curl back slightly during initial heat exposure. With continued heating, this lifted area will generally lay back down on its own. If not, lightly tap the lifted edge as necessary with your finger or a wooden Popsicle stick. Use caution when touching the tubing as it will be hot and sticky. Shrink the entire overlap seam length before attempting to recover the remaining tubing.

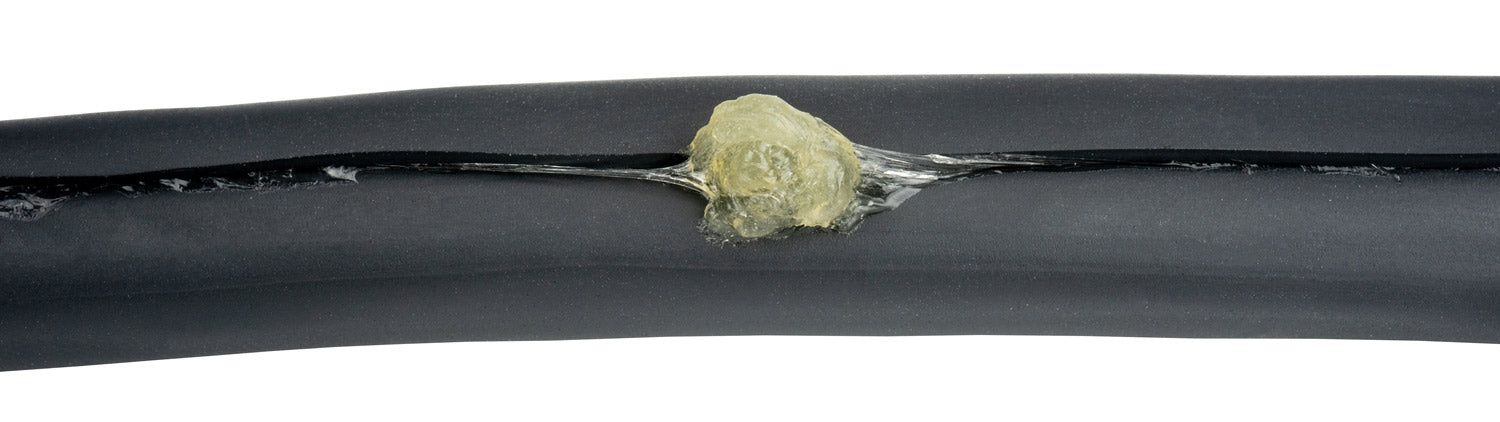
Slowly heat the entire overlap seam area length and work from the center towards the ends. Too much heat, too quickly, in one location will cause the hot melt adhesive to expand unevenly and possibly rupture the overlap seam. Refer to the Troubleshooting section at the end of this document. The key to a successful installation is to "sneak up" on the tubing with the heat source. Do not be afraid to pull the heat source away and let the tubing cool slightly if it appears that the overlap seam is being pulled apart. Once the overlap seam is fully shrunk, allow it to cool for a minute or two. You may find that most of the remaining tubing has also shrunk (especially on small size repairs). Heat the remaining unshrunk tubing areas to smooth out any wrinkles and cold spots. Once the tubing is fully shrunk, apply heat over the entire tubing length and circumference in a smooth and even motion. Ensure that the hot melt adhesive has flowed and begun to ooze out from under both ends of the tubing. PRT-ES® (100) material will flow quite easily and exhibit a finished part with a bulbous adhesive fillet. The PRT-ES® (135) hot melt adhesive does not flow nearly as easily as the PRT-ES® (100) and will generally create a small tapered fillet.

On both types of PRT-ES®, the installation is acceptable as long as there is adhesive visible around the entire wire circumference at the end of the shrink tubing.

Do not attempt to remove the hot melt adhesive fillet! If the adhesive fillets are uneven around the circumference of the wire or undesirable looking cosmetically, you can re-apply heat to the fillet area and dress the excess adhesive. This can be done using a Popsicle stick or by orientating the repaired wire (if possible) so that gravity causes the molten adhesive to slump and flow to the area where it is needed. In general, a fillet that covers the entire wire/jacket end circumference of the repair sleeve is what's important and not the cosmetic look of the fillet.
Note: On very small diameter wire repairs you may need to use a magnifying glass or loop to see the fillet properly.
While the assembly is still slightly warm to the touch (but the hot melt adhesive has fully solidified), use your thumb and rub the tubing overlap seam edge to remove any exposed closure adhesive. Excess adhesive will ball up ahead of your thumb. Discard.

Allow the assembly to cool to room temperature before placing in service.
Caution: Do not attempt to remove excess closure adhesive using solvents.
Procedure B - Step 1: Sizing
A PRT-ES® type installation can also be made on wire or cable with diameters greater than .250" using Zippertubing's PRT® Shrink Tubing and Z-Block® (100) or Z-Block® (135) hot melt tape applied as two separate components. Measure your wire or cable diameter and select the correct size PRT® Tubing size and Z-Block® hot melt tape materials from the table below.
| Cable Diameter (in.) | PRT® Tubing p/n ZT98-04-016-* | Z-Block® (100) Tape p/n: ZT02-03-002 | Z-Block® (135) Tape p/n: ZT11-03-001 (Note 1) |
|---|---|---|---|
| 0.25 to 0.37 | #3 | 1/2 | 1/2 |
| 0.38 to 0.49 | #4 | 1/2 | 1/2 |
| 0.50 to 0.62 | #5 | 1/2 | 1/2 |
| 0.63 to 0.74 | #6 | 1.0 | 1.0 |
| 0.75 to 0.87 | #7 | 1.0 | 1.0 |
| 0.88 to 0.99 | #8 | 1.0 | 1.0 |
| 1.0 to 1.12 | #9 | 2.0 | 2.0 |
| 1.13 to 1.24 | #10 | 2.0 | 2.0 |
| 1.25 to 1.37 | #11 | 2.0 | 2.0 |
| 1.38 to 1.49 | #12 | 2.0 | 2.0 |
| 1.50 to 1.62 | #13 | 2.0 | 2.0 |
| 1.63 to 1.75 | #14 | 2.0 | 2.0 |
| 1.75 to 1.87 (see Note b) | #15 | 2.0 | 2.0 |
For cable sizes beyond 1.87" diameter contact the Zippertubing® Company engineering department for recommendations.
Procedure B - Step 2: Preparation & Positioning
Use a razor knife to remove any protruding pieces of cable insulation. Clean the repair area of all debris and oil contamination using a mild solvent like Isopropyl Alcohol (IPA).
Use Zippertubing's Z-Block® hot melt tape and cut it to the desired width using a pair of scissors or razor knife. Ensure that the white paper release liner has been removed from the amber colored Z-Block® Tape prior to wrapping the cable. Helically wrap the tape over the area to be repaired so that each wrap butts up with the next or slightly overlaps and equals the length of the PRT® repair tubing.
Use a soldering iron or the hot end of a heat gun to melt the last tape wrap overlap so the tape will stick to itself and does not unwind. On large cables the damaged cable jacket may have deep nicks or voids. If so, cut extra pieces of the Z-Block® Tape and pack the void areas prior to applying the helically wound tape over that area.

Wrap the PRT-ES® tubing around the damaged wire with the adhesive release liner facing away from the wire. Peel back a portion of the release liner and expose the adhesive. Position the non-adhesive edge of the tubing over the exposed adhesive and align so the edge just covers the entire adhesive area and no more. Begin bonding the tubing overlap edge to the adhesive. Avoid contacting the adhesive with your fingers as much as possible. Remove short sections of the release liner until the entire tubing length is sealed. Rub the overlap seam area firmly using your thumb to work out any wrinkles. Minor wrinkles will disappear when the tubing shrinks.

Center the closed PRT-ES® tubing over the damaged area of the wire or cable.

Procedure B - Step 3: Shrinking
PRT-ES® tubing requires the use of a hot air type of heat gun with a temperature setting of 90°C minimum. For best results, use a heat gun with a small reducer nozzle that will localize the heat stream. Generally, a heat gun temperature of 150°C is sufficient to shrink the PRT-ES® material and allow the hot melt adhesive to flow.
Note: You can shrink the tubing in place immediately after sealing. The closure adhesive has no cure time requirements.
Begin shrinking the PRT-ES® tubing by directing the heat source at the adhesive overlap seam area near the center of the repair tubing. Apply heat to the adhesive overlap area only! The overlap area will tend to curl up into a "U" shape as it is heated. Continue to apply heat in short bursts to this area until the surrounding tubing begins to shrink and pull the "U" shape back down flat. Do not be afraid to apply extra heat to the overlap area, as it will take extra dwell time for the inside layer of the overlap to begin to shrink since this area is double thick. Do not be alarmed if the outer layer of the overlap flap tends to lift off the adhesive and curl back slightly during initial heat exposure. With continued heating this lifted area will generally lay back down on its own, if not, lightly tap the lifted edge as necessary with your finger or a wooden Popsicle stick. Use caution when touching the tubing as it will be hot and sticky. Shrink the entire overlap seam length before attempting to recover the remaining tubing.
Slowly heat the entire overlap seam area length and work from the center towards the ends. Too much heat, too quickly, in one location will cause the hot melt adhesive to expand unevenly and possibly rupture the overlap seam. Refer to the Troubleshooting section at the end of this document. The key to a successful installation is to "sneak up" on the tubing with the heat source. Do not be afraid to pull the heat source away and let the tubing cool slightly if it appears that the overlap seam is being pulled apart. Once the overlap seam is fully shrunk allow it to cool for a minute or two. You may find that most of the remaining tubing has also shrunk (especially on small size repairs). Heat the remaining unshrunk tubing areas to smooth out any wrinkles and cold spots. Once the tubing is fully shrunk, apply heat over the entire tubing length and circumference in a smooth and even motion. Ensure that the hot melt adhesive has flowed and begun to ooze out from under both ends of the tubing. PRT-ES® (100) material will flow quite easily and exhibit a finished part with a bulbous adhesive fillet. The PRT-ES® (135) hot melt adhesive does not flow nearly as easily as the PRT-ES® (100) and will generally create a small tapered fillet. On both types of PRT-ES®, the installation is acceptable as long as there is adhesive visible around the entire wire circumference at the end of the shrink tubing.
Do not attempt to remove the hot melt adhesive fillet! If the adhesive fillets are uneven around the circumference of the wire or undesirable looking cosmetically, you can re-apply heat to the fillet area and dress the excess adhesive. This can be done using a Popsicle stick or by orientating the repaired wire (if possible) so that gravity causes the molten adhesive to slump and flow to the area where it is needed. In general, a fillet that covers the entire wire/jacket end circumference of the repair sleeve is what's important and not the cosmetic look of the fillet.
Note: On very small diameter wire repairs you may need to use a magnifying glass or loop to see the fillet properly.
While the assembly is still slightly warm to the touch (but the hot melt adhesive has fully solidified), use your thumb and rub the tubing overlap seam edge to remove any exposed closure adhesive. Excess adhesive will ball up ahead of your thumb. Discard.
Allow the assembly to cool to room temperature before placing in service.
Caution: Do not attempt to remove excess closure adhesive using solvents.
Troubleshooting
The most common problem likely to occur when installing a PRT-ES® part is a seam rupture. This is a condition where the molted Z-Block® hot melt tape bursts through an area of the overlap seam of the PRT® tubing during installation. Seam ruptures are most likely to occur during the learning phase of PRT-ES® installations. Once the proper installation technique has been mastered this problem will disappear. Rushing to complete an installation is a big factor in creating a seam rupture.
Seam ruptures occur for several reasons and all can be controlled by the installer. Below are the main reasons for seam ruptures;
- Wrong Size: The PRT-ES® or PRT® tubing selected was too small for the cable diameter being repaired.
- Excessive Tape: Too much Z-Block® Tape was applied which increased the overall cable diameter beyond what the PRT-ES® or PRT® tubing could accommodate.
- Excessive Heat: The installer applied too much heat and/or applied the heat too quickly to the PRT-ES® or PRT® tubing.
If a rupture occurs, verify that Wrong Size and Excessive Tape are not the cause. If they are not the cause then adjust the heating technique by applying the heat more slowly and evenly. Review the "sneak up" on it heating technique described under Procedure "A", Step 3, Section 2.
Note: Excessive Tape and Excessive Heat are the most common cause of seam ruptures. Control these and the problem will disappear.
Seam ruptures are undesirable and should be avoided. Cable assemblies with a diameter of <.250" exhibiting a seam rupture should have the jacket removed and replaced to Ensure a viable repair. Follow the correct installation technique to eliminate this problem.
Cable diameters >.250" exhibiting a seam rupture, which is away from the actual defect repair area may be reworked and still maintain a good environmental seal.
Note: Prior to proceeding with any seam rupture rework, consult with your in-house Quality Assurance department and obtain approval to proceed with a repair.
a.) If you experience a seam rupture and the hot melt adhesive is oozing out through the tubing overlap area, stop applying heat in that immediate area and allow it to cool down. Adjust your heating technique as described above and finish installing the assembly.
b.) Once the entire assembly is finished and has cooled down to room temperature return to the seam rupture and re-heat the localized area until the hot melt adhesive is soft. Use the end of a Popsicle stick and work the raised tubing lip down as smooth as possible while it's hot. Use the radius end of the Popsicle stick and scrape off the excess adhesive in a direction parallel to the overlap split line. You may have to repeat this process several times to obtain a nice appearance. Allow the area to cool to room temperature.
c.) The seam rupture area will never look quite as good cosmetically as the seam areas that were properly installed. However, that does not necessarily mean that they are defective and cannot be used. As long as there is a thin bead of the "Z-Block®" hot melt adhesive present along the overlap split line in the area of the rupture you have a usable assembly. Because the entire jacket is sealed with the hot melt adhesive there is no way for liquid to find its way to the repaired defect area. The same condition would exist if the rupture were not repaired. However, repairing a rupture is desirable because it eliminates the raised lip condition which could create a potential snag problem resulting in further damage.
Installer Note: Using the PRT-ES® repair method will generally eliminate a very large amount of cable harness disassembly and rework time. As a result, don't be in a big rush to complete the installation. Take a few extra minutes to plan the installation, heat the sleeve slowly and work the materials as necessary to ensure a good first time repair. The extra time spent doing this will pale in comparison to the time required to perform a classic repair that involves connector disassembly.